Using the campus Wi-Fi “MCUT_802.1x” on Windows: Windows 10
Due to the system certificate update for the wireless network, if you have previously configured “MCUT_802.1x,” please remove the existing settings first. The removal steps are provided above. If you have never configured “MCUT_802.1x” before, you may skip this step and proceed directly to the setup instructions below (quick shortcut to “Start Setting Up the MCUT_802.1x Wireless Network”).
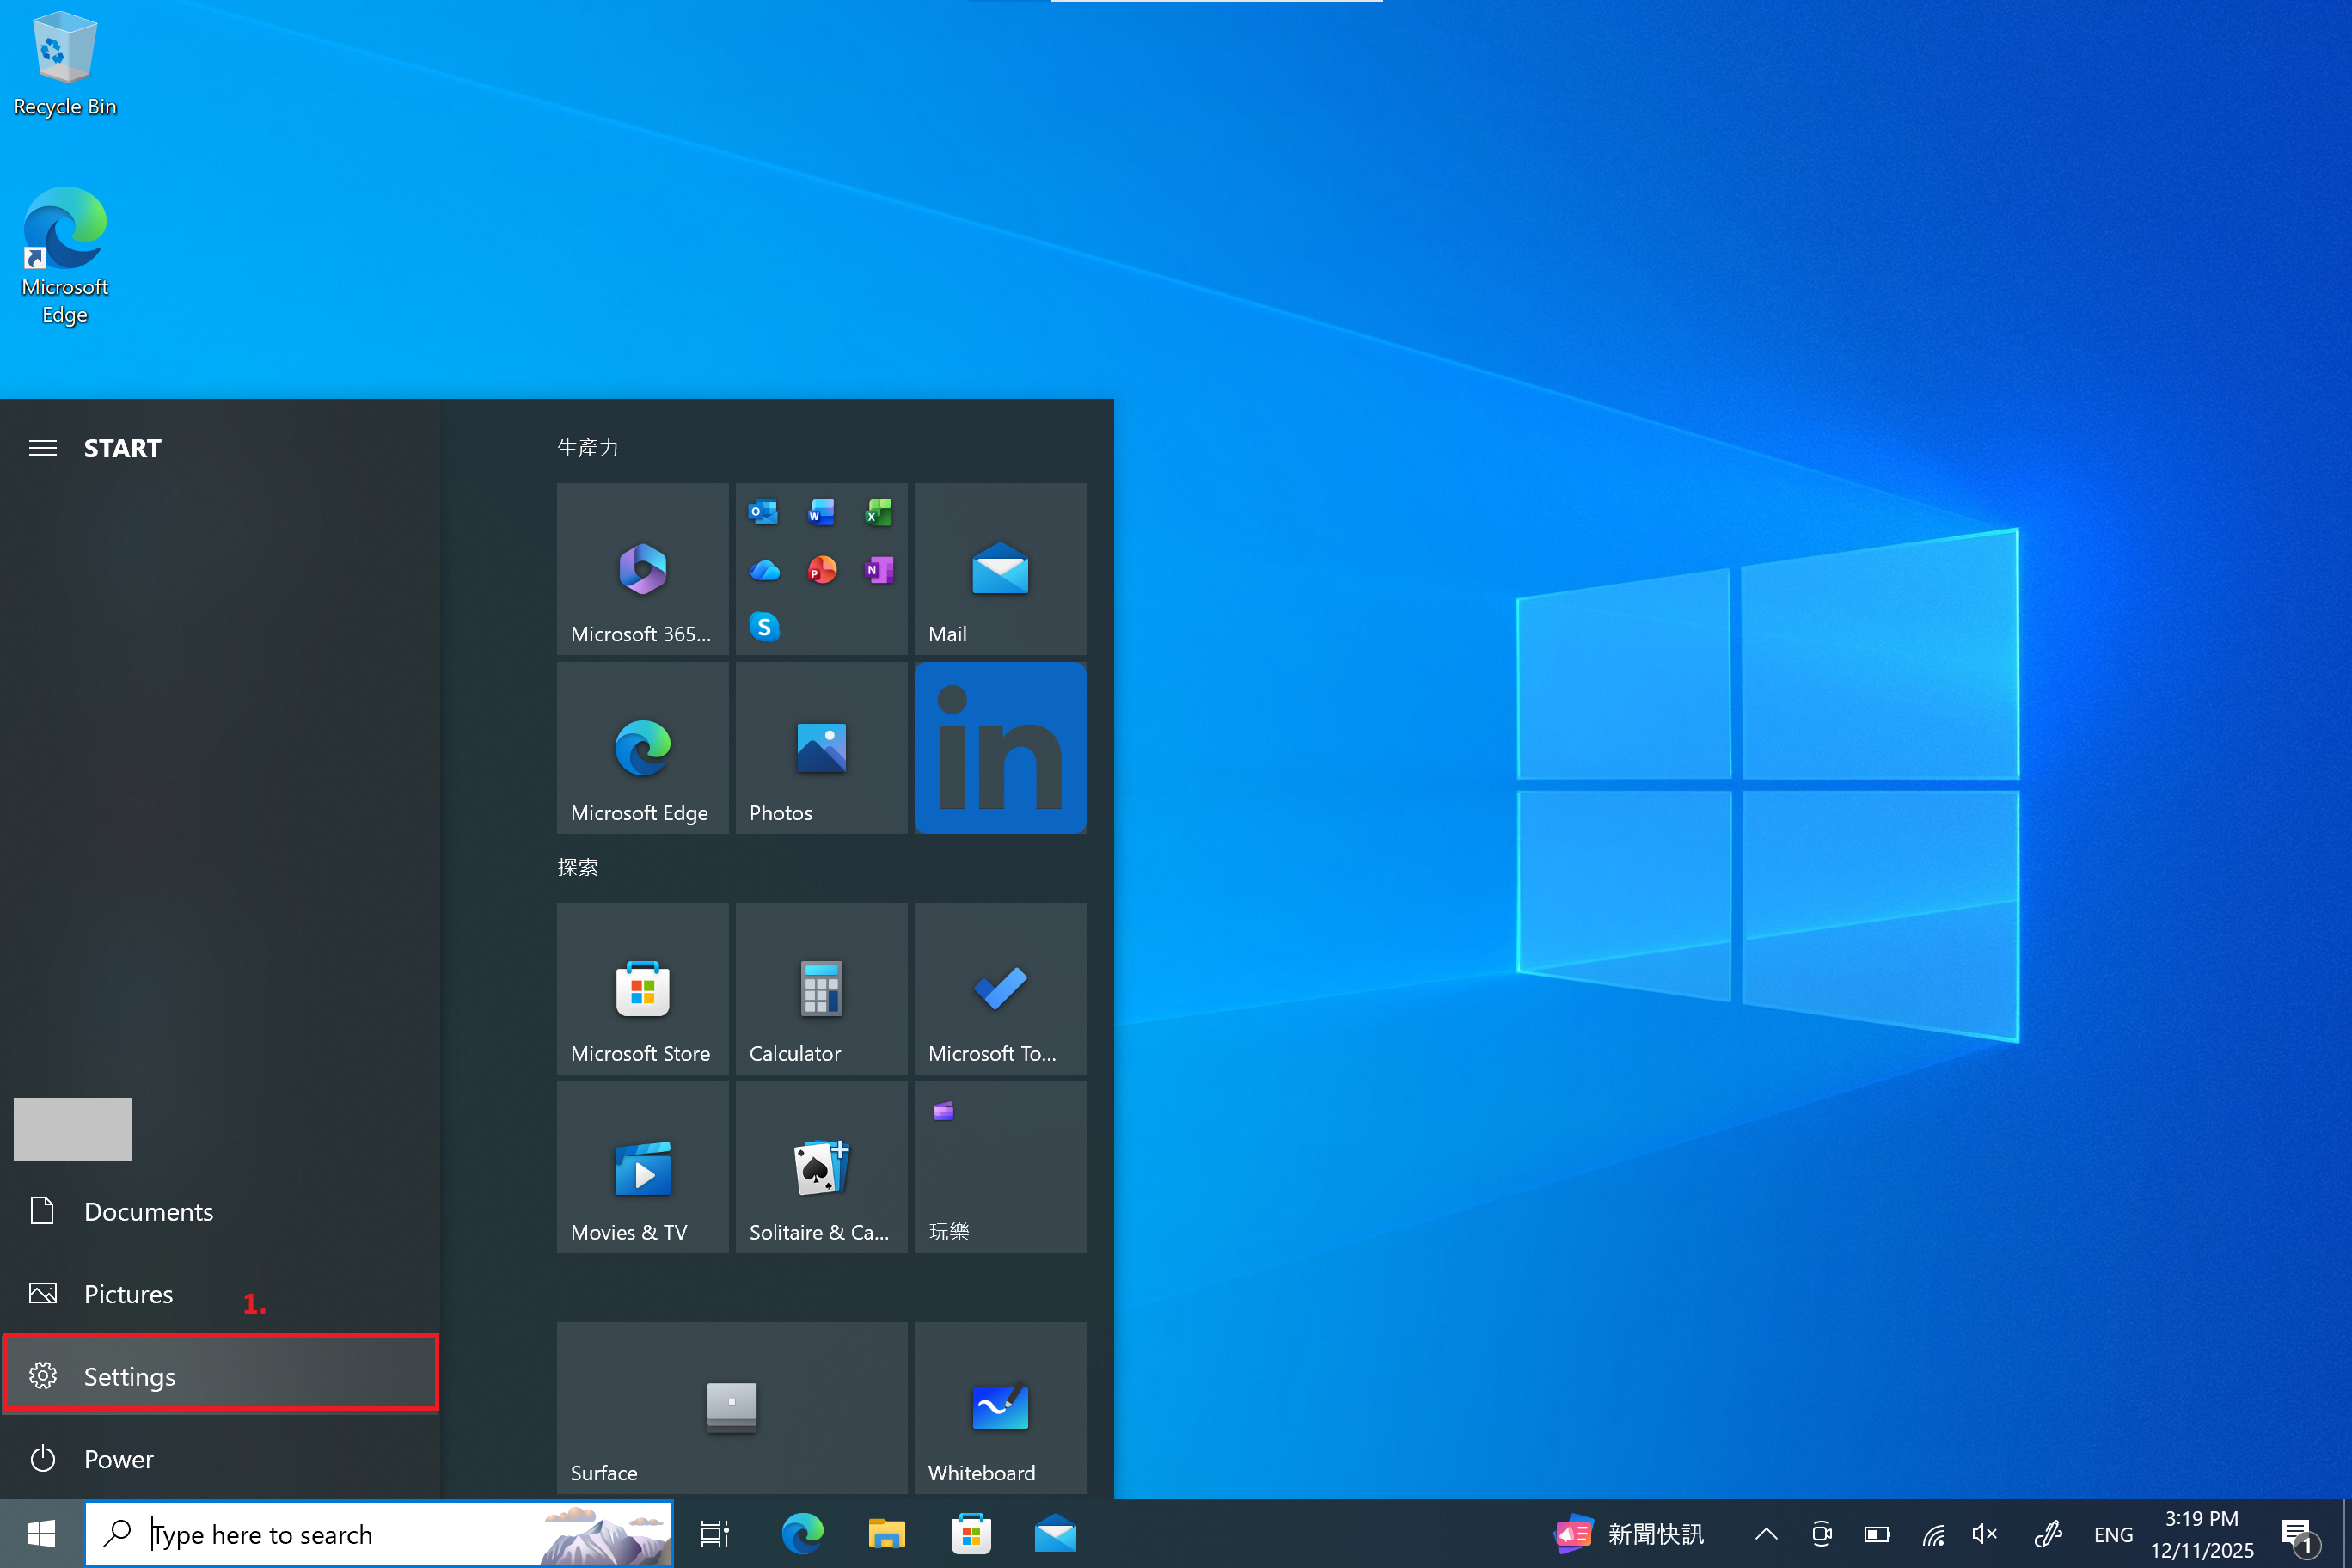
Step1. Settings
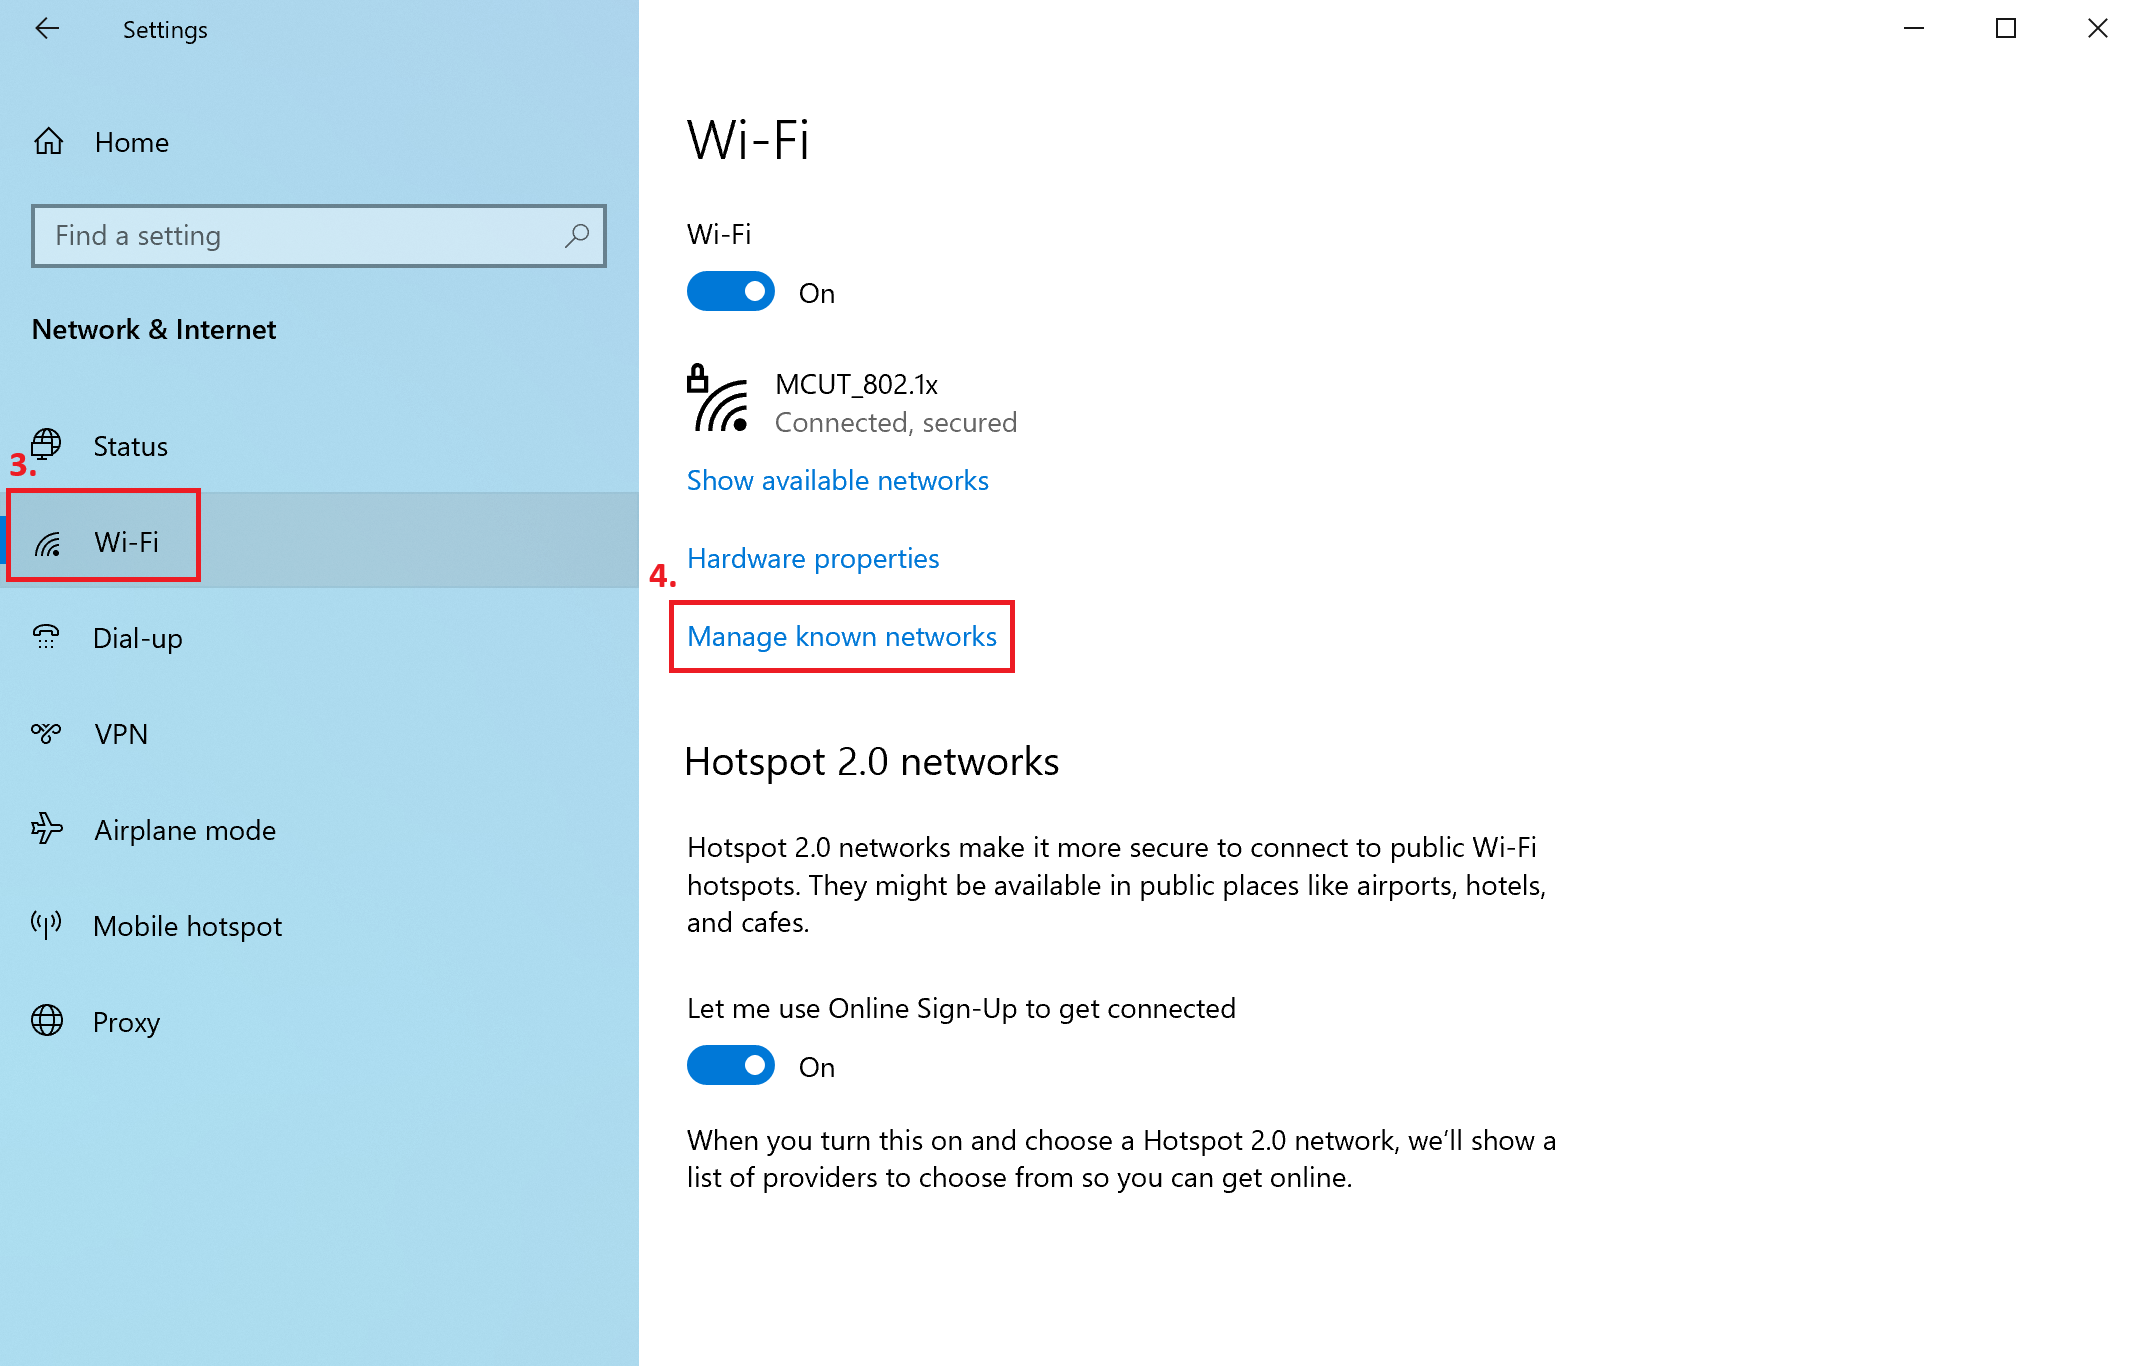
Step2. Network & Internet

Step3. Click Wi-Fi
Step4. Click Manage known networks
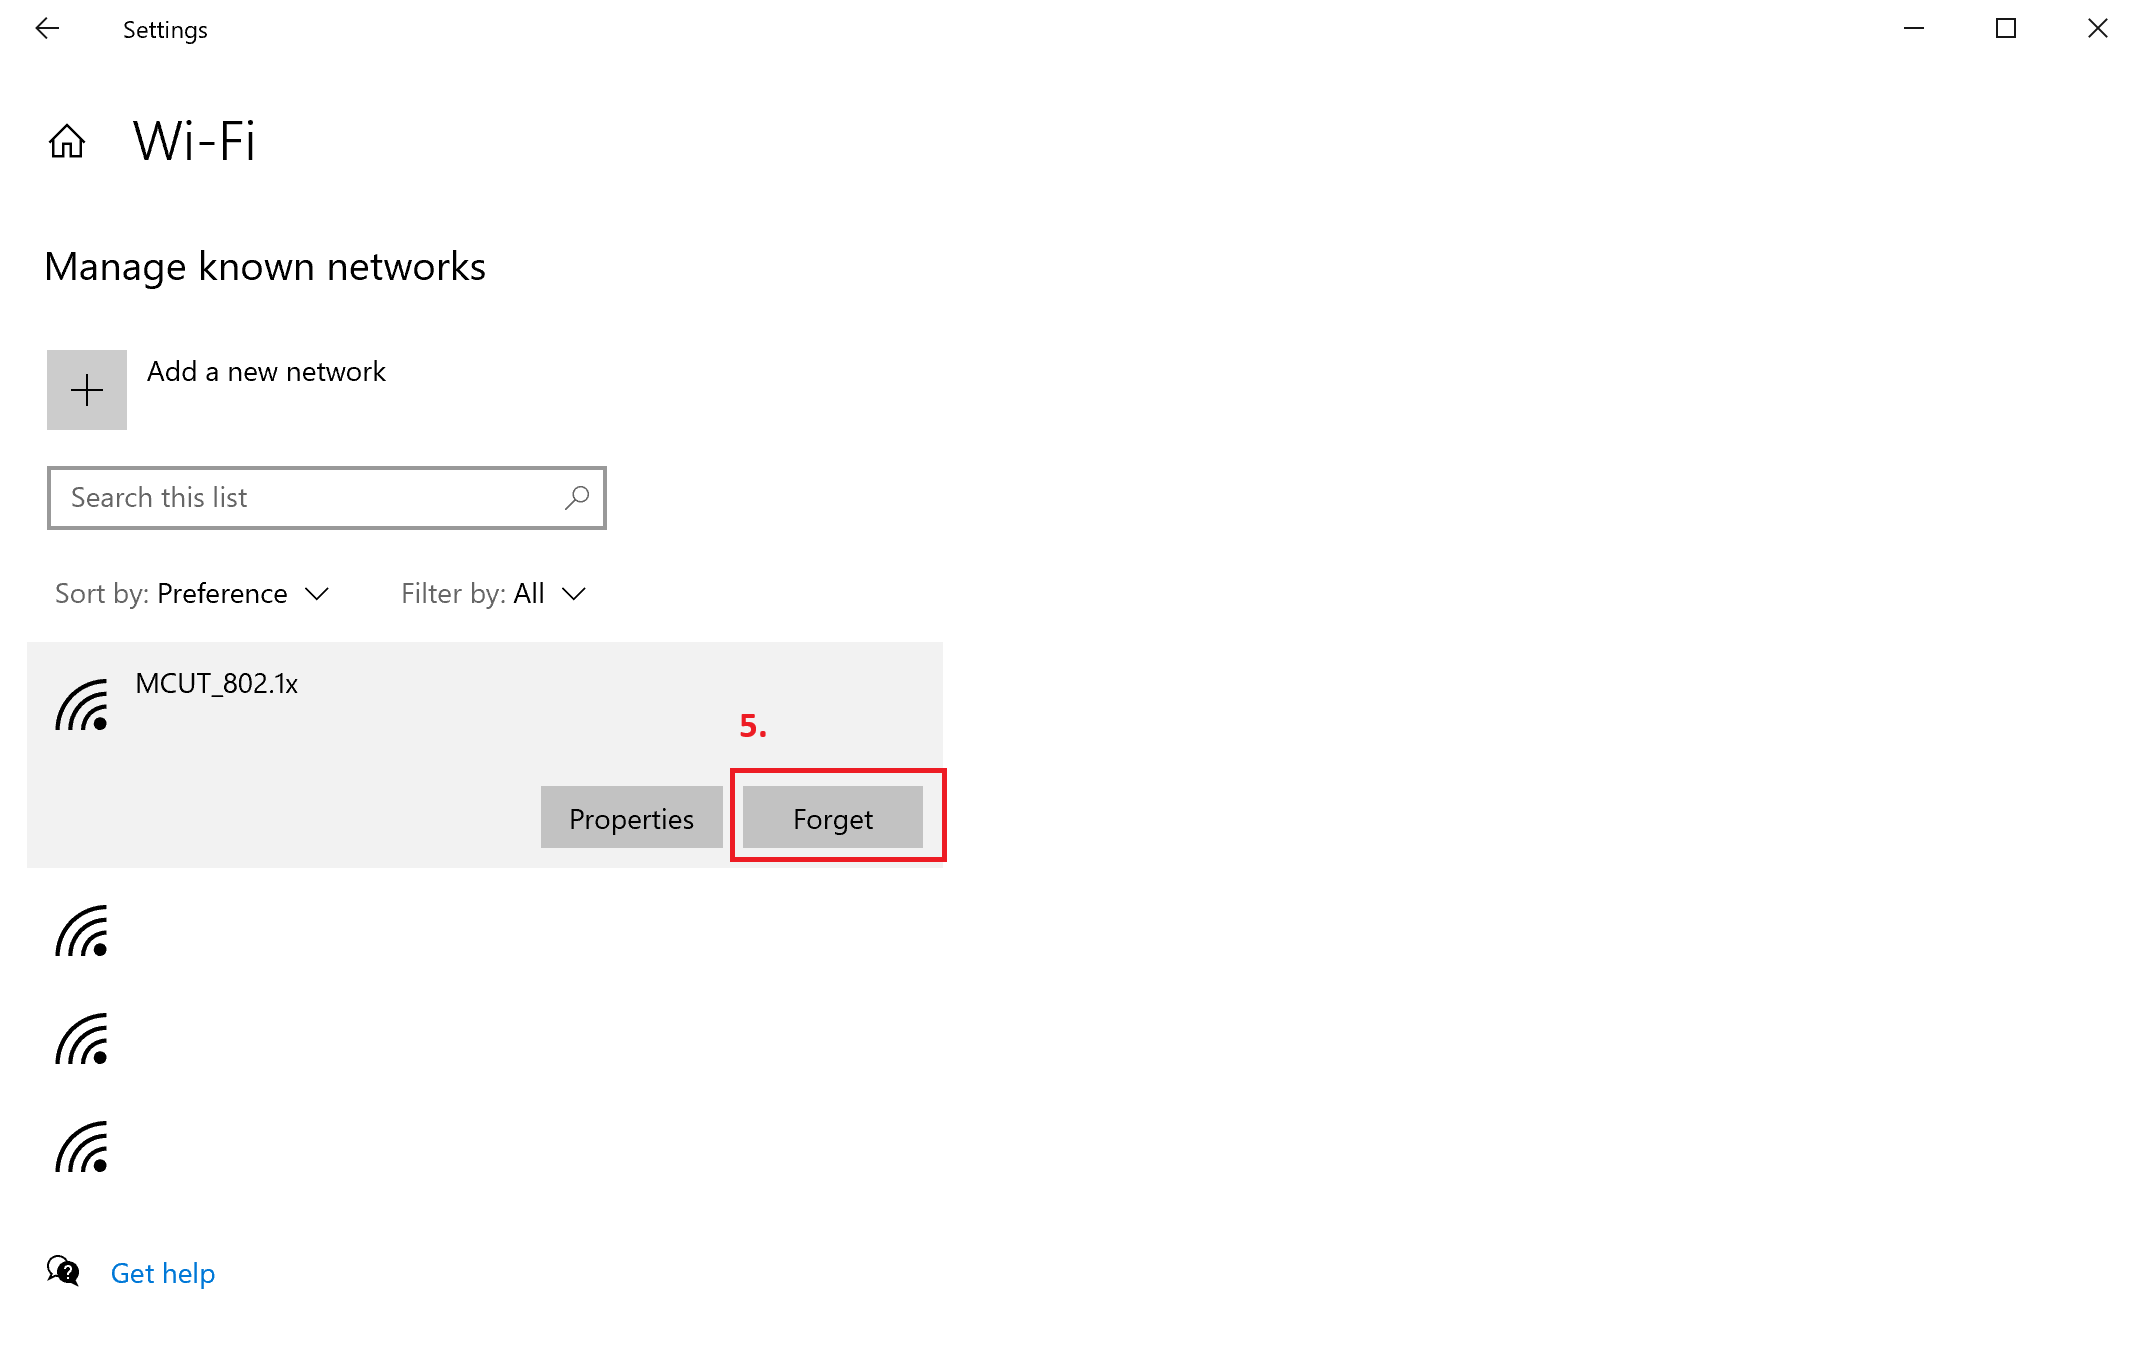
Step5. Forget
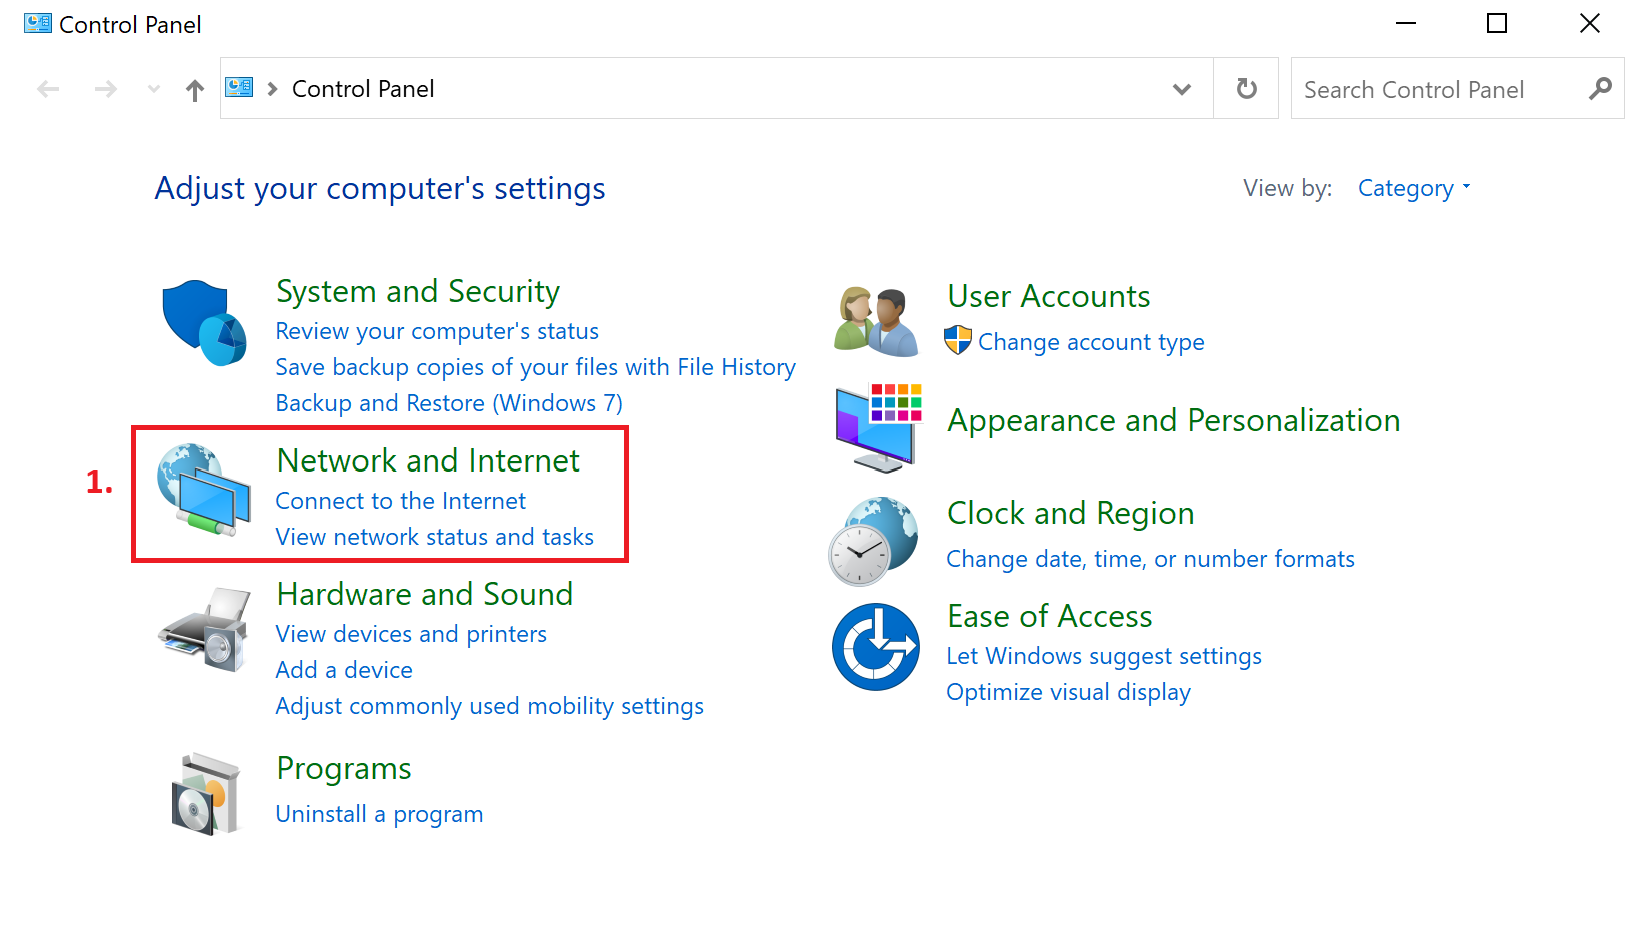
Start Setting Up the MCUT_802.1x Wireless Network
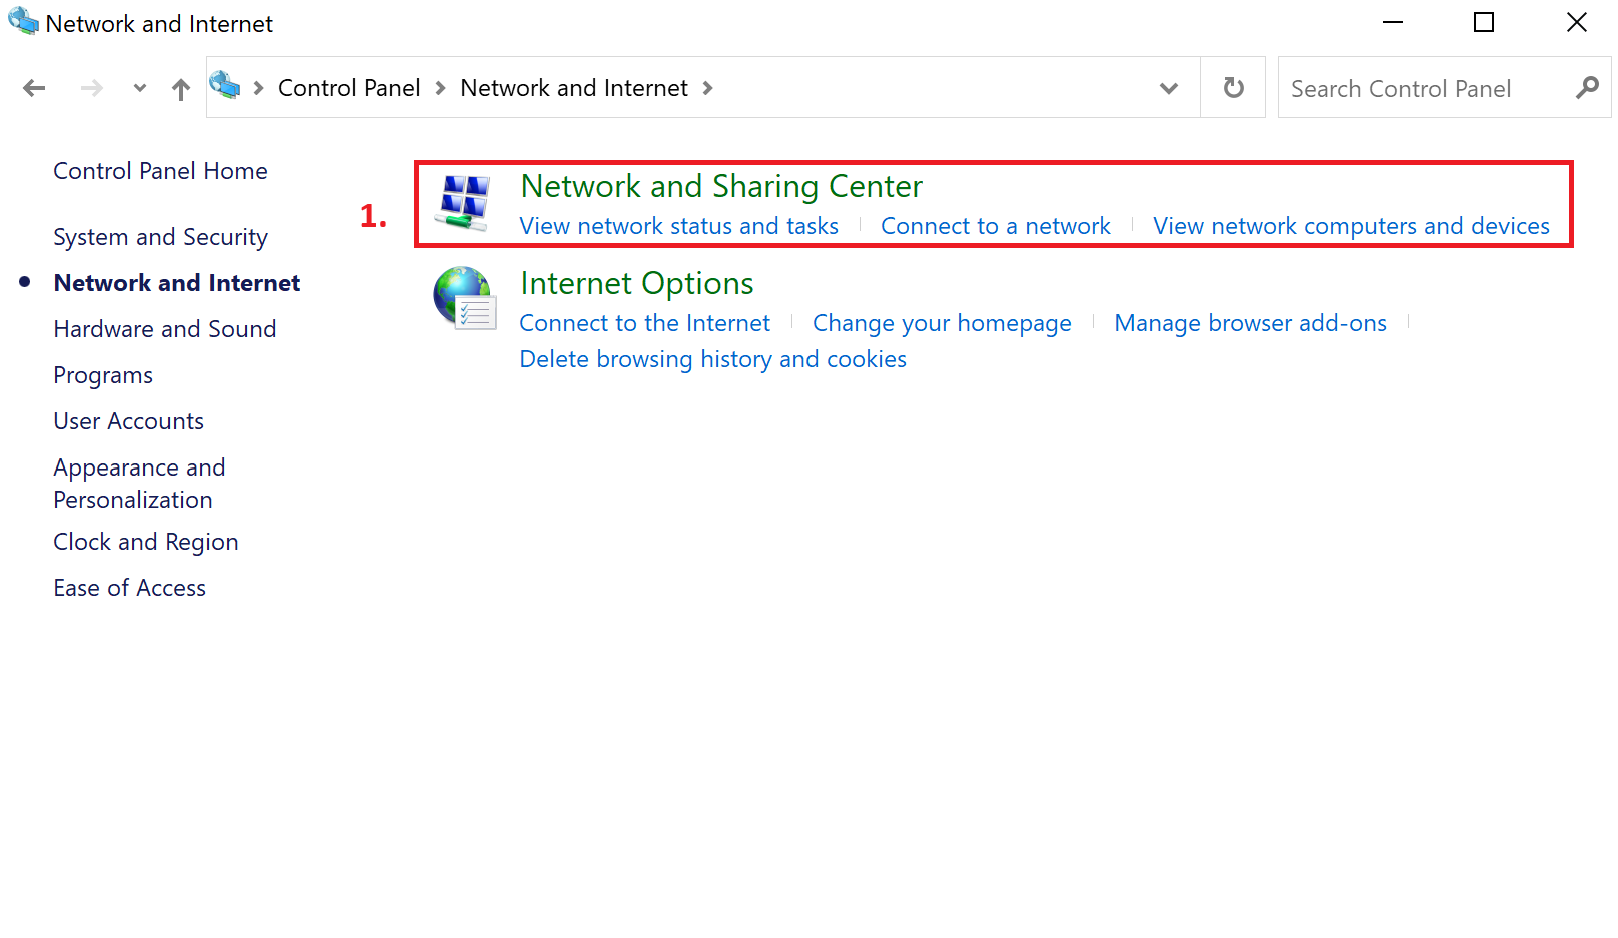
Step 1. Open Control Panel and click Network and Internet.
Step2.Click Network and Sharing Center
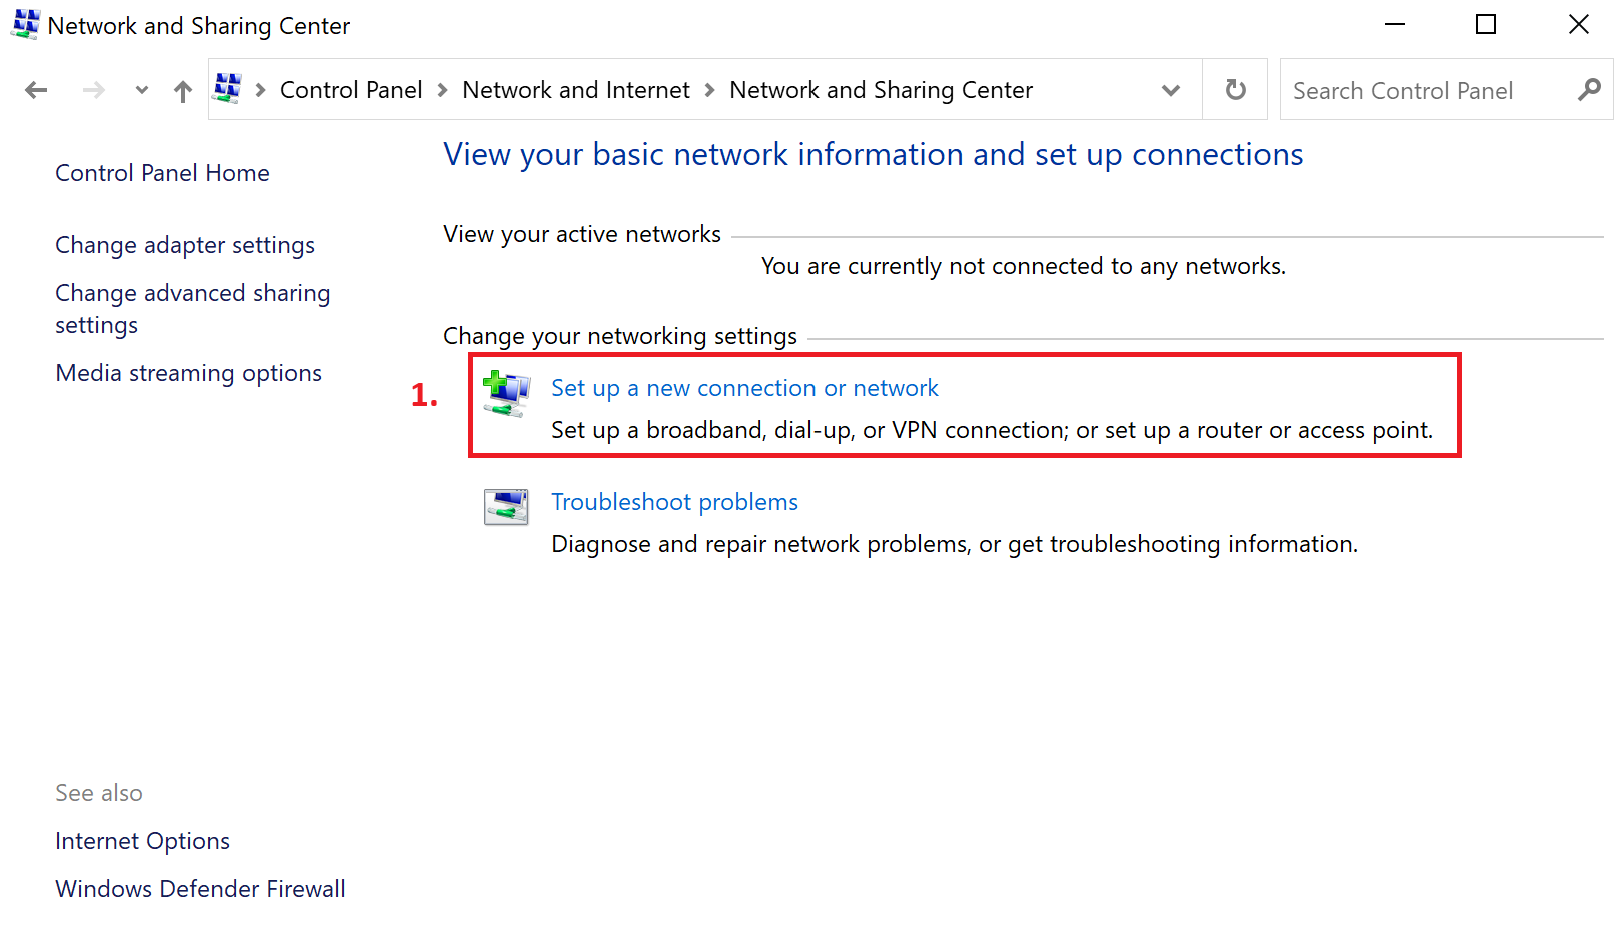
Step3.Click Set up a new connection or network
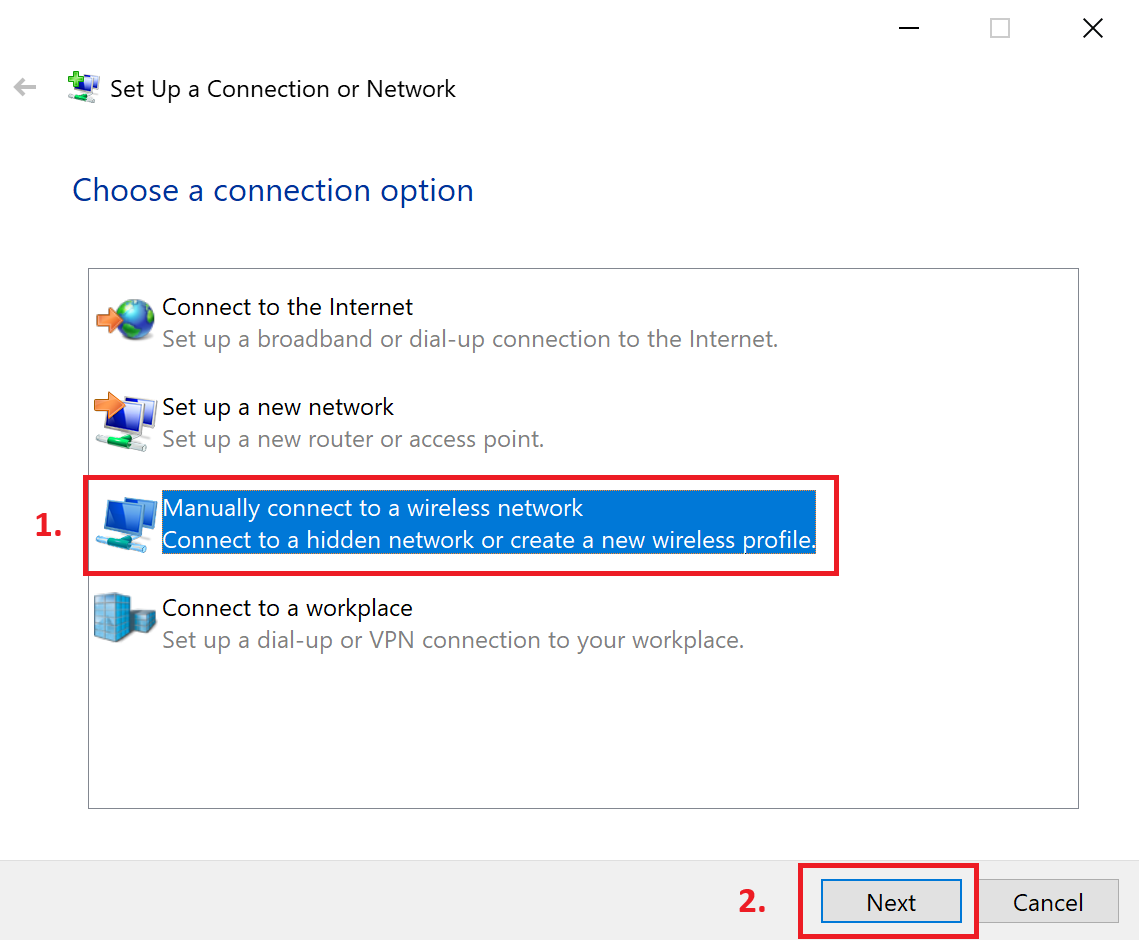
Step 4. In the Set up a connection or network window, select Manually connect to a wireless network, then click Next.
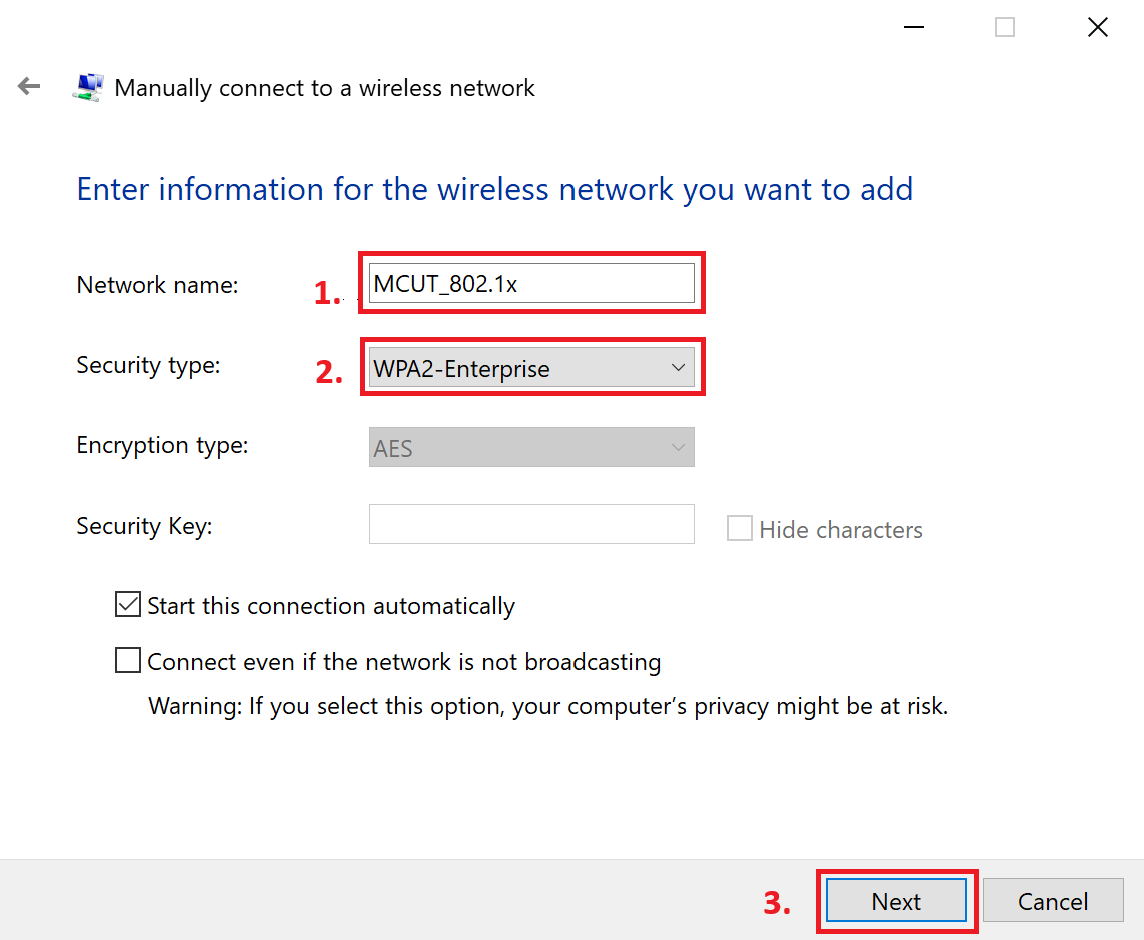
Step 5. In the Manually connect to a wireless network window, enter the network information:
-
Network name: MCUT_802.1x
-
Security type: WPA2-Enterprise
-
Then click Next.
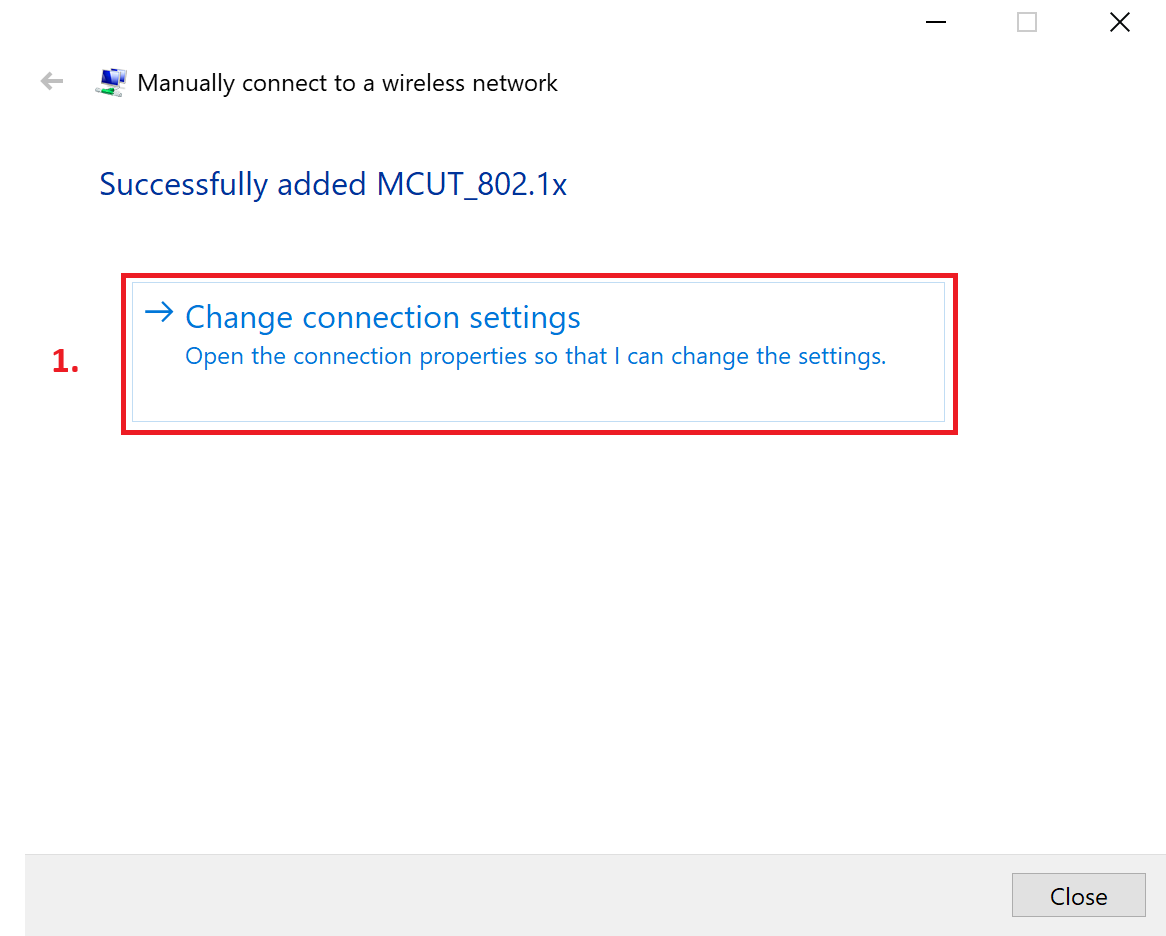
Step 6. After the message “Successfully added MCUT_802.1x” appears, click Change connection settings.
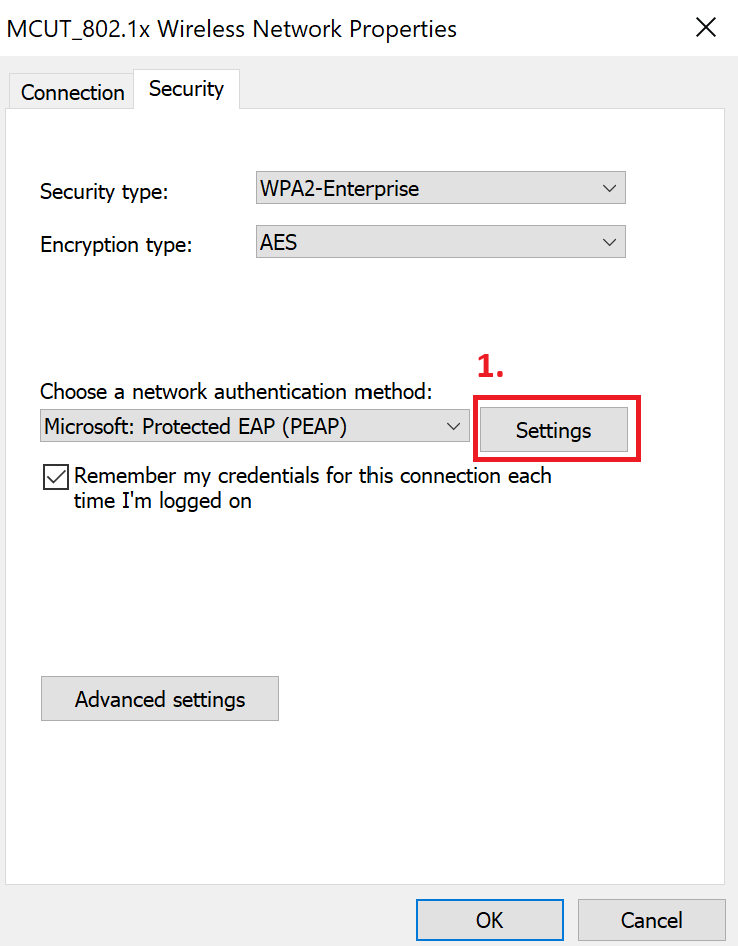
Step 7. In the MCUT_802.1x Wireless Network Properties window, under the Security tab, verify that the settings match the reference image, then click Settings.
Step 8. In the Protected EAP Properties window:
-
Check “Verify the server’s identity by validating the certificate”.
-
Set the Trusted Root Certification Authority to TWCA Global Root CA.
-
After selecting, make sure to uncheck “Verify the server’s identity by validating the certificate.”
-
Ensure that the authentication method is Secured password (EAP-MSCHAP v2), then click Configure.
.png)
.png)
Step 9. In the EAP MSCHAPv2 Properties window, do NOT check “Automatically use my Windows logon name and password.” Click OK, then click OK again in the Protected EAP Properties window.
.png)
.png)
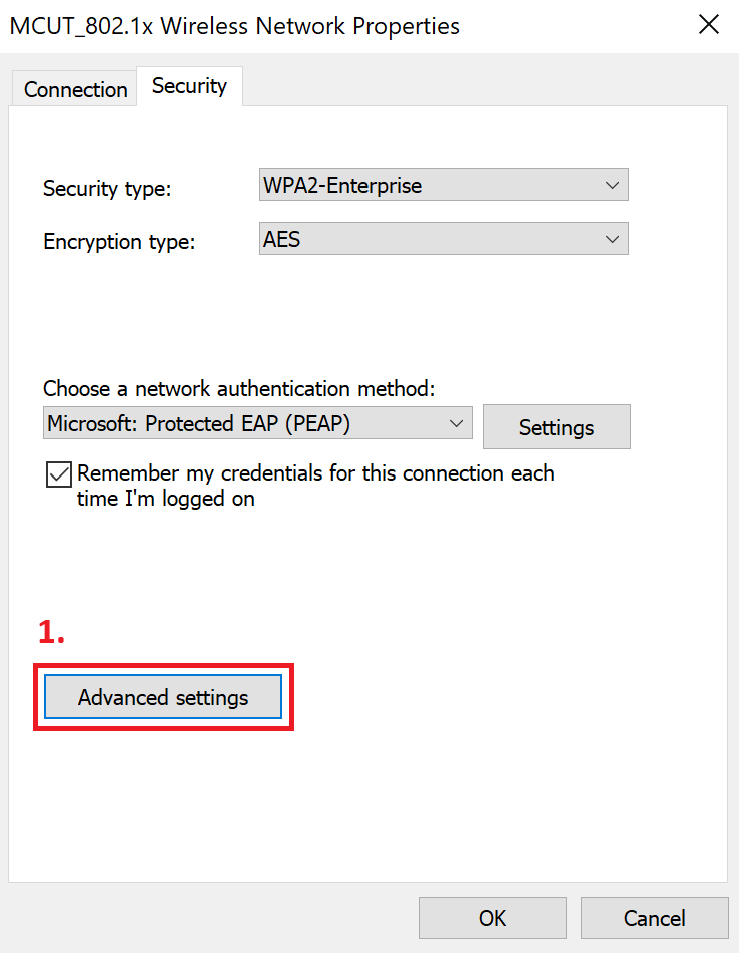
Step 10. In the MCUT_802.1x Wireless Network Properties window, under the Security tab, click Advanced settings.
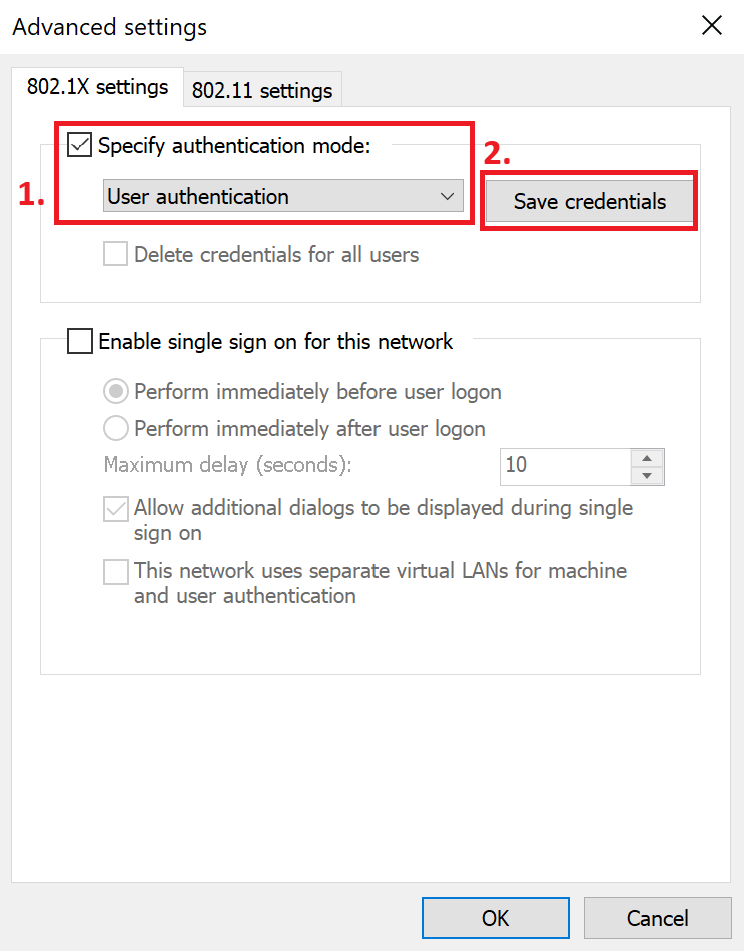
Step 11. In the Advanced Settings window, under the 802.1X settings tab, check Specify authentication mode and select User authentication, then click Save credentials.
Step 12. In the Windows Security window, enter your network authentication credentials:
-
Username: Your MCUT Portal account
-
Password: Your MCUT Portal password
-
Click OK, then click OK again in the Advanced Settings window.
..png)
..png)
Step 13. After completing the steps above, confirm that “MCUT_802.1x” shows “Connected.” Once authenticated, you may begin using the wireless network.
